Roll20 Free Account Macros⚑
This guide is not intended to teach you how to become a roll20 master. It is for people who want a free Roll20 experience, with a measure of portability. The goal is to show you how to quickly build character macros without even using a character sheet. Why would we do this?
Benefits of Building your own macros⚑
- Free
- Maximum portability (store the data how you want, and transmute it however you want)
- Level up and make adjustments outside the VTT
Dice Rolling⚑
To roll dice just place double brackets around the expression. For example, [[1d20]].
You can pair this with simple language, to start making basic macros for things like saves. For example, Fort: [[1d20+5]] (+1 vs poison effects).
Multiple-line dice rolling⚑
You can use multiple lines by prefacing your input with the /me command (you need a space after "me"). An attack macro might look like this:
/me
Longspear hits AC [[1d20+8]]
for [[1d8+4]] Piercing damage.
You can store this in a text document on your computer, or a spreadsheet and paste it into roll20. You don't need fancy character sheets.
You can even make macros for multiple attacks:
/me
Longspear, Strike 1, hits AC [[1d20+8]]
for [[1d8+4]] Piercing damage.

Longspear, Strike 2, hits AC [[1d20+8-5]]
for [[1d8+4]] Piercing damage.
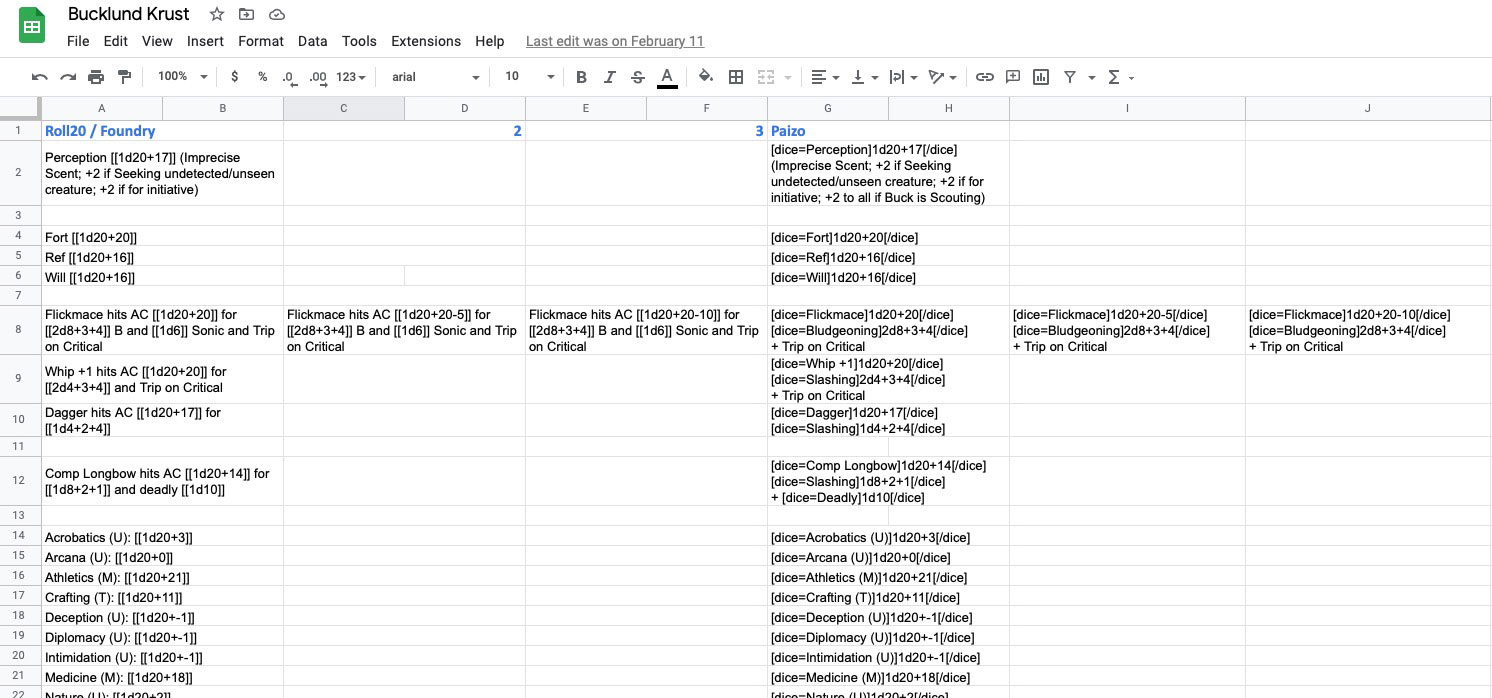
Storing Macros⚑
Many players store their macros in a text document, or an excel spreadsheet. That way they have the data whenever and wherever they want. When they level up, they can update the macros however they choose to.
Saving Macros⚑
You can quickly build and save macros for whatever game you're in.
- In Roll20, click the Collections icon on the top right (the 3 dotted-list icon).
- Click
Addand a new window will appear. - Name the macro whatever you want — but it must be one word. For example, a Will save macro might be called
Will. - Type in your macro text (see above).
- Click
Test Macro.You should see the dice roll in the chat window. - Click
Save Changes. - Now you will see the macro in the panel and you can use it any time by clicking into that panel, and clicking the d20 icon next to the name.
Putting Your Macros in the Bar⚑
- In Roll20, click the Collections icon on the top right (the 3 dotted-list icon).
- Click
Show macro quick bar?; this will activate the quick bar. - Click the
In Baroption next to whatever macros you want to see. - You should now see the button on your screen.
Video Example: Adding a Macro to the Bar
Rolling Initiative & Adding it to the Tracker⚑
You can roll initiative at the click of a button and get it automatically added to the tracker. While this isn't needed, it's a big time saver and helpful to the GM. Here is that basic macro:
/roll 1d20 + YOUR_MODIFIER &{tracker:+}
But initiative can change often depending on our Exploration Activity, and if someone is scouting. So we need to put that number in a place where we can modify that value easily.
Creating an Editable Initiative Macro⚑
If you notice, your token has 3 bubbles above it when you click it. You can inject the value of this button into macros. This is useful for initiative.
- In Roll20, click the Collections icon on the top right (the 3 dotted-list icon).
- Click
Addand a new window will appear. - Name the macro at the top (just call it
Init). - Add this macro:
/roll 1d20 + @{selected|bar2} &{tracker:+} - Click
Save Changes. - Click
In Barwhere the macro now appears on the Collections Menu. - You should now see an
Initbutton under your name in roll20. - Click on your token. Add the modifier to the rightmost bubble.
- Test the macro. When you click the
Initbutton, it will roll initiative and add it to the tracker for you, using whatever initiative modifier you wrote in the bubble. If you need to change your exploration activity, just click on your token and change the bubble's value.
Here's a copy-paste able macro. bar2 targets the rightmost bubble. Don't ask me why.
/roll 1d20 + @{selected|bar2} &{tracker:+}
Adding & Editing an Initiative Bar
Check your Bubble on New Maps
You may need to edit the bubble on your default token, or add the number every time you drag a new token onto a map. It's always a good idea to double check when your GM puts you on a new map.
Adding Hit Point Bars⚑
Many teams prefer a visual indicator of teammates' hit points. You don't need a full character sheet to add a hit point bar. You can use the bubbles, like we showed above… only this time, you don't even need a macro.
- Click your token
- Click the cog wheel
- In
Bar 1click theAttributedropdown - Scroll through all the options and select
hit_points(there are tons of options, but they're alphabetical) - Enter your max value (
X) - Click
Save Settings - You should now see a bar above your PC that says
0/X - Click the bubble
- Enter the HP
Taking Damage & Healing⚑
Instead of re-calculating your HP every time you take damage, you can subtract.
- Click your token
- Click the bubble
- enter a
-symbol and the amount of damage you took
To heal, reverse the process:
- Click your token
- Click the bubble
- enter a
+symbol and the amount of damage you took
Video Example: Adding & Editing a Hit Point Bar