Creating & Splitting Chronicles⚑
Author: Doug Hahn⚑
As a GM, you have to give your players chronicles. Back in the days of true pen and paper gaming, the GM could simply print a copy of the chronicle for each player and fill it out at the table. This model no longer works in many cases, as online gaming and paperless accounting have become more prevalent. However, Paizo's scenarios are copyright protected, so you can't easily edit them! Services like RPG Chronicles can build your chronicles for you as well.
Making Chronicles with Free Software⚑
This guide will use Preview, the default PDF reader for macOS, but the steps will also work for Foxit Reader on Windows as well as many other readers of choice (including swanky ones like Acrobat Pro).
Whatever software you prefer the general method is the same: you extract a single page from the PDF and edit it with the base info like event number, and then make copies and fill them out with player specifics. To achieve this, you will use the Print to PDF feature that ships with common software or is built into your OS.
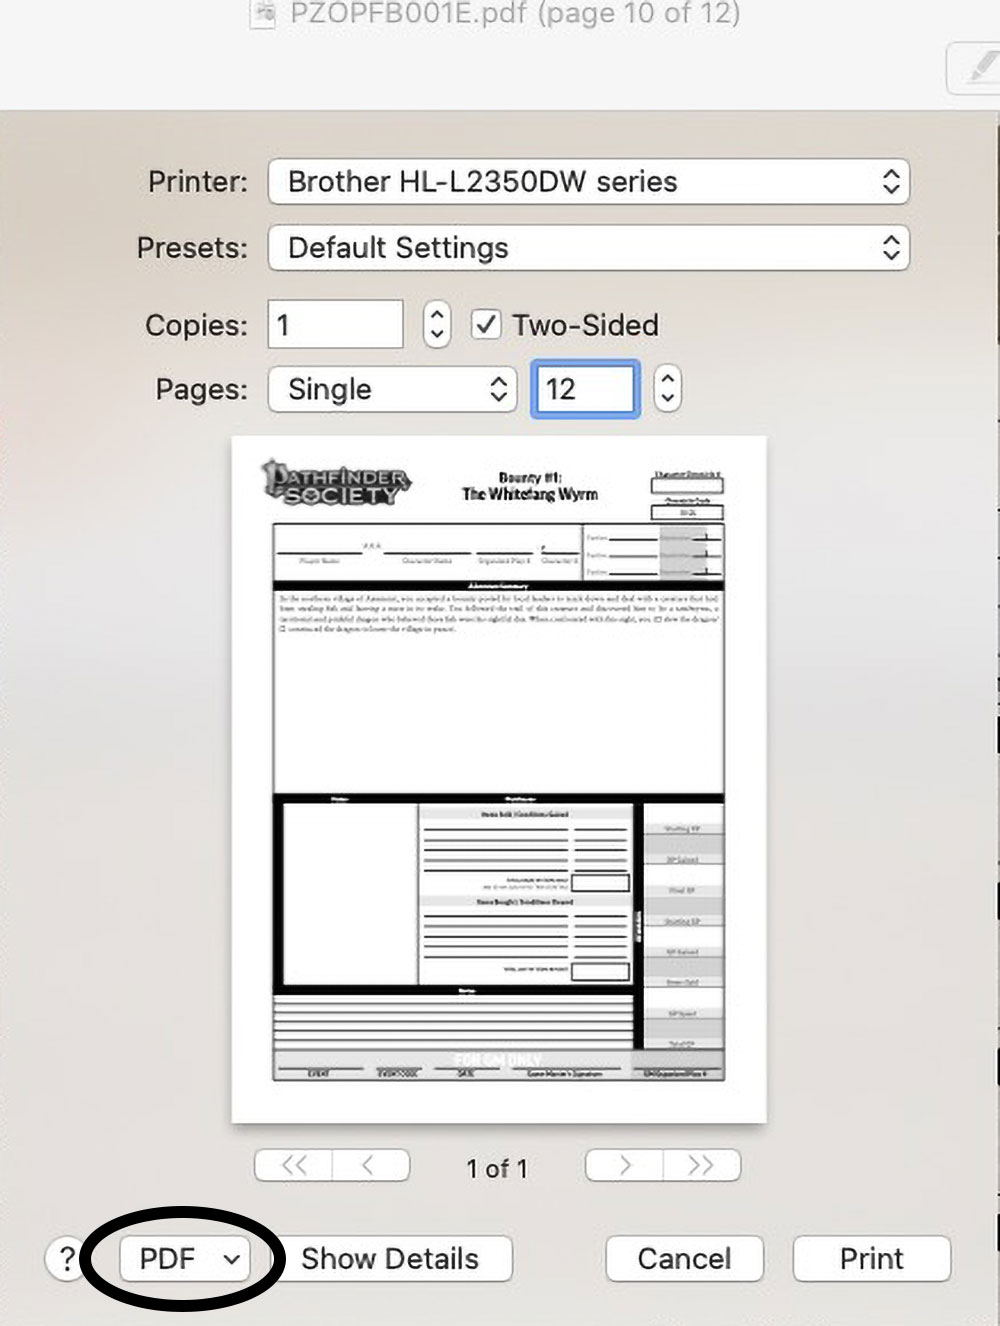
Extract the Page⚑
- Click
File=>Print - Name the file, and save it in a directory that you can find
- It's a good idea to create a directory for your chronicles, as you will be creating up to 7 of these things!
Create the Base Chronicle⚑
- Locate the typewriter or text annotation tool
- On Preview, this is under
Tools=>Annotate=>Text - On Foxit there is a
Typewriterbutton on the top toolbar
- On Preview, this is under
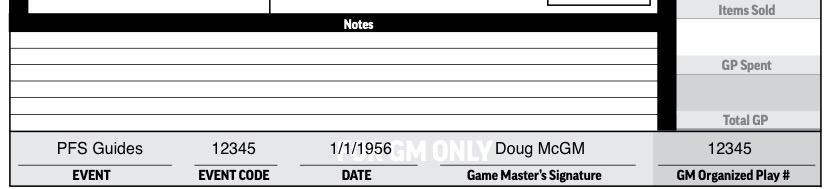
- Fill in the information that will go on all chronicles.
- Event Name
- Date
- Org Play #
- Your name in lieu if Signature
- Bonus Faction
- Reputation earned (generally, players earn the same reputation unless one is going slow)
- Fill in dummy text or all the customized areas
- Player Name
- Character name
- Org Play ID
- Character #
- GP
- XP
- Checkboxes
- Click
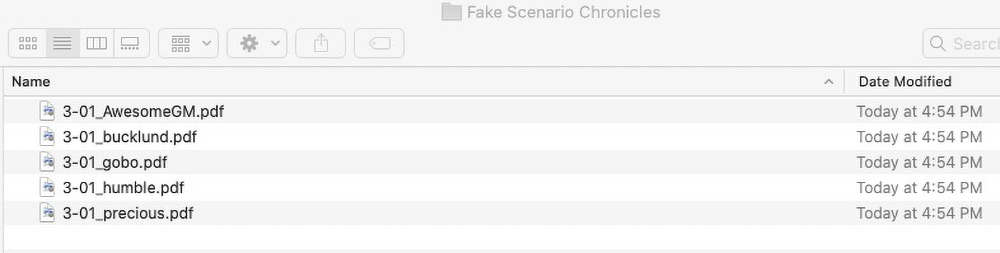
Save - Copy the file as many times as you need

Create the Chronicles⚑
- Name each file so you know what character each chronicle they belong to
- On macOS you can select the item then press
Return - On Windows you can select the file and press
F2
- On macOS you can select the item then press
- Edit the dummy test as appropriate
- Save
Always Save Your Work
Players often find mistakes on their chronicles, forget to sign in as slow track, etc. If possible, always back up your chronicle sheet work to avoid having to do re-work!
Share the Chronicles⚑
Share the chronicles in whatever way is easiest for you. Some GMs prefer uploading them to a Google Drive folder; others prefer sending them out manually via email. Whatever is easiest for you is best… it's a lot of work!
Making Chronicles with RPG Chronicles⚑
RPG Chronicles lets you sign up for free and generate chronicles; you need to own the PDF and upload a special code that's on the chronicle sheet.
See the how it works guide on RPG Chronicles.
Finding the Code
Make sure to close tags; there is a forum bug where if you leave a [b] tag open, it makes the entire game bold — and it cannot be undone! The only recourse is to start a whole new game thread.

Sending the information to the reporter⚑
If you're not reporting, make sure to Make sure to send the information to the designated reporter for the event. There is a Save Reporting Information button on the Chronicles and Reporting page that will copy all the info to your clipboard.
A note on Accessibility⚑
The author tested the chronicles with text annotation on Preview.app as well as RPG Chronicles. MacOS VoiceOver picked up all the added text in both instances. However, the items on the PDF came through in the incorrect order. This seems to be an issue with the PDF structure and/or tags. There is not much a GM can do about it. As always, try to do your best and keep in mind text annotation is better than a hand-written chronicle when dealing with digital assets.
Final Thoughts⚑
There is often a tradeoff between convenience and ease of use; those who GM often may find services such as RPG Chronicles convenient. VOs who report many games may even find the paid version of RPG Chronicles convenient, as it offers a Google Chrome extension that does one-click reporting for you.
On the other hand, many GMs get by just fine by practicing, refining their workflows, and gaining proficiency with the tools they have available. Some GMs claim they can generate PDFs by hand in just a couple of minutes.
As always, there isn't one right way to do it: do whatever you can to get players chronicles quickly, with as little pain as possible.